
24July 2026
Homeowners often turn to online price calculators when dealing with a hole in the wall or a water-stained ceiling. The problem is that most online calculators give wildly inaccurate numbers because they price only the visible repair, not the actual work involved. A homeowner might see an estimate for a $25 patch, but that number completely ignores travel time, setup, protecting the home, matching existing finishes, compound drying times, and the reality that a small job still requires the same basic overhead as a larger one.
Understanding real-world pricing means looking past the cost of a sheet of drywall and focusing on the process required to make the damage disappear completely.
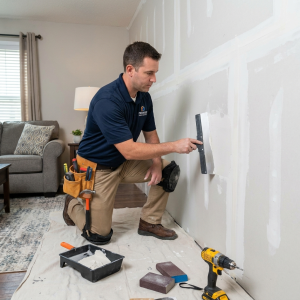
What Real Drywall Repairs Actually Cost
From a professional handyman’s point of view, typical repair ranges reflect the labour, materials, preparation, cleanup, and multi-step finishing required for a quality result.
Small Drywall Repairs
Small repairs usually involve minor dents, nail pops, or localized holes.
-
Small nail holes or minor patches typically range from $100 to $200.
-
Doorknob-sized holes (2 to 6 inches) generally cost between $150 and $300.
-
Larger holes requiring a custom drywall patch, tape, compound, sanding, and paint touch-ups range from $250 to $500.
Medium Drywall Repairs
When damage covers multiple areas or requires extensive blending, costs increase based on access and room setup.
-
Multiple wall patches across a room run between $300 and $700.
-
Larger sections of damaged drywall cost between $500 and $1,200.
-
Texture matching or working on older walls often adds to the total because blending into an existing surface takes additional skilled labour.
Ceiling Leak Repairs
Ceiling repairs are where generic calculators fail most severely because drywall damage is usually just a symptom of an underlying issue.
-
Small water stains with minor structural repair cost between $200 and $500.
-
Cutting out and replacing a damaged ceiling section ranges from $500 to $1,500.
-
Large ceiling leak repairs involving insulation replacement, multiple sheets, stain-blocking primer, repainting, or high-ladder access run from $1,500 to $3,000 or more.
Before repairing ceiling drywall, the leak source must be completely fixed. Repairing the drywall while plumbing or roof issues remain active means doing the exact same work twice.
Why Small Jobs Cost More Than Homeowners Expect
The biggest disconnect between homeowner expectations and actual repair quotes comes down to skilled labour and fixed costs. A homeowner might think a repair should cost $20 because materials are cheap. What isn’t visible is the full process: floor protection, proper backing installation, multiple coats of compound, sanding without making a mess, texture matching, priming, and detailed cleanup.
Furthermore, small jobs still carry fixed operational overhead. Whether a repair involves a tiny hole or a large sheet replacement, a professional still incurs travel time, tool loading, material sourcing, site setup, and scheduling constraints.
Flat-Rate vs. Hourly Billing: Charging for Process over Time
For most drywall repairs, flat-rate pricing makes the most sense for both the contractor and the homeowner. Homeowners want clarity on total costs upfront, while drywall work is inherently about the multi-step process rather than continuous labor hours spent on-site.
A small repair may only take an hour of active hands-on work, but getting a flawless finish requires a multi-visit schedule:
-
Cutting, preparing, and installing proper backing and patches.
-
Applying an initial coat of joint compound.
-
Waiting for proper drying time between coats.
-
Applying second and third coats for seamless blending.
-
Precision sanding, stain-blocking, priming, and painting.
Charging purely by the hour fails to capture the true skill level and operational trips required to finish the job correctly.
Job Conditions That Impact Your Final Quote
Two holes of the exact same size can have completely different prices depending on where they are located and the surrounding environment.
Textured Ceilings and Walls
Matching an existing surface pattern is one of the hardest parts of drywall work. A patch can be structurally perfect, but if the texture does not blend seamlessly, the repair will stand out forever.
Overhead Ceiling Work
Ceiling repairs require working overhead on ladders or scaffolding. Gravity makes applying compound, holding sheets, and sanding far more difficult and time-consuming, while requiring double the site protection.
High Walls and Access Difficulty
A two-foot hole on a standard wall is quick to access. That same hole on a high foyer ceiling requires specialized scaffolding, extra setup time, and heightened safety precautions.
Working in Occupied Homes
Working in a fully furnished, lived-in house requires far more care than working in a vacant property. Protecting furniture, laying down floor protection, containing fine dust, and cleaning up thoroughly adds significant time to the job.
Paint and Finish Matching
Older homes often have faded paint, multiple coats of age, or discontinued colors. Making a patch invisible often turns a simple localized repair into a broader blending and painting task.
The True Cost of DIY and Cheap Quick-Fixes
Homeowners rarely lose money because they attempted a quick DIY project; they lose money when a quick fix hides a deeper issue or creates additional mess that a professional must undo later.
One notable job involved a basement ceiling leak. The homeowner noticed a small stain, cut out the wet piece, slapped on a patch, applied mud, and painted over it. Unfortunately, they never properly checked the moisture radius, nor did they install proper support backing behind the patch. Within months, the ceiling began to sag, moisture stains bleed through, and the finish cracked along the perimeter.
When called in to fix it, the proper scope required removing the failed DIY patch, checking the surrounding structure, adding solid wood backing, installing new drywall, applying multiple coats of compound with full drying cycles, blending the texture, stain-blocking, and painting.
The homeowner originally spent around $150 on DIY supplies that completely failed. Re-doing the work correctly cost between $700 and $1,000. Had a professional handled the job from the start, the initial cost would have been closer to $500 to $700 because there would have been no failed patch to tear out. Paying extra upfront frequently prevents paying twice in the end.
How Professionals Contain the Mess
Dust control and home disruption are massive concerns for homeowners. The difference between a true craftsman and a quick-and-dirty contractor comes down to preparation and cleanup protocols.
Professional Site Setup and Containment
A proper setup protocol prevents fine drywall dust from migrating across the entire house:
-
Inspecting the space and planning dust control before cutting anything.
-
Moving light items and wrapping heavy furniture in plastic sheeting.
-
Covering floors with clean, heavy-duty surface protection.
-
Setting up plastic containment barriers across doorways and open corridors.
-
Using vacuum-assisted tools and source-containment while sanding.
-
Conducting full HEPA vacuuming, wiping down nearby surfaces, and removing all debris before leaving.
Budget contractors often skip floor protection, apply far too much compound, sand aggressively without vacuum attachments, leave fine white dust over surrounding furniture, and rush drying times.
The Smart Buyer’s Checklist: Questions to Ask Before Hiring
Comparing drywall quotes purely on price leads to bad outcomes because cheap quotes often skip critical finishing steps. Homeowners should use this checklist to evaluate prospective contractors before signing off on a job.
Key Questions to Ask Every Contractor
-
Have you done this exact type of repair before? (Ensure they have specific experience with water damage, textured ceilings, or matching older finishes.)
-
What specific steps are included in your quote? (Verify whether backing installation, multiple coats, sanding, primer, paint, and full cleanup are covered.)
-
How will you make the repair blend into the existing wall or ceiling? (Listen for detailed answers about feathering, texturing, and priming.)
-
What specific steps do you take to control dust and protect my home? (A professional will explain floor runners, plastic barriers, and active vacuum sanding.)
-
How long will the repair process actually take? (Be skeptical of anyone promising a complete, perfect finish on a deep repair in just two hours without drying cycles.)
-
What happens if the repair cracks or fails? (Look for clear guarantees on workmanship.)
Red Flags to Avoid
-
Anyone who gives a firm price without seeing photos or inspecting the damage in person.
-
Quotes that simply read “repair drywall” with no breakdown of materials, coats, or finishing.
-
Contractors who claim drywall sanding won’t make any mess and skip site protection.
-
Anyone demanding full payment upfront before work begins.
-
Contractors who rush drying times by applying thick mud in a single pass.
A quality drywall repair should look like the damage never happened in the first place. Paying for true craftsmanship ensures the repair is done once, done right, and completely invisible.