
18September 2026
Most wall mount compatibility articles stop at the TV. They tell you to check the VESA pattern, confirm the weight, and maybe glance at the bolt size. And that’s fine as a starting point, but in my experience as a residential handyman in Mississauga, the TV is only half the equation. The other half is the wall, and that’s where most compatibility problems actually live.
I’ve been doing TV wall-mount installations across Mississauga and the surrounding GTA for years, for homeowners and rental properties alike. My work isn’t selling hardware. It’s making sure the bracket is the right one, the wall can actually hold it, and the finished result looks clean and feels safe. This post covers what I tell clients before they spend money on the wrong mount, and the wall conditions that catch people off guard in older GTA homes, condos, and fireplace feature walls.
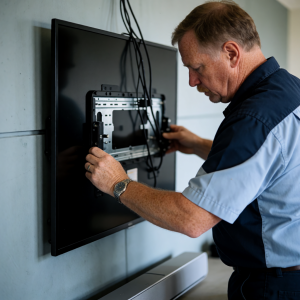
Why Screen Size Alone Won’t Tell You If a Mount Will Fit
The most common mistake I see homeowners make is assuming that the TV’s screen size is enough to choose a wall mount. It isn’t. A “55-inch” TV and a “65-inch” TV can have completely different VESA hole patterns, different weights, and different screw requirements. Two 65-inch TVs from the same brand, even different model years, can use different mounting hole spacings.
Here’s a real example from the job. A customer bought a mount advertised for 65-inch TVs. On paper, the size matched. The weight matched. But when we got to the mounting step, the TV used a 400 x 300 mm VESA pattern and the mount only supported 400 x 400 mm. The mounting holes simply would not line up correctly. The TV looked like it should fit based on everything on the box, but it didn’t.
Before you buy a mount, do the following:
- Write down the TV’s exact model number, not just the brand and screen size.
- Look up the manufacturer’s specifications for the VESA pattern and the weight of the TV without the stand.
- Confirm that the mount’s supported VESA range includes that exact pattern, not just the screen size range.
- Check the required bolt diameter and length, especially if the TV has recessed mounting holes or requires spacers.
- Confirm that the mount’s weight rating exceeds the TV’s actual weight by a comfortable margin.
A common secondary problem is choosing the correct VESA pattern but overlooking the screws. A bolt that is too short may not hold securely. A bolt that is too long can bottom out inside the TV and damage internal components. Manufacturers specifically advise checking the appropriate screw length, and it’s one of the details that separates a clean install from a damaged TV.
What VESA Actually Means and Why It Matters
VESA is the standard that defines the spacing of the four mounting holes on the back of your TV, measured in millimetres as width x height. Common patterns include 200 x 200, 300 x 200, 400 x 300, and 400 x 400.
The number matters because a mount’s horizontal and vertical rails can only extend within a specific range. If your TV’s holes are lower and farther apart than the bracket can reach, the mount physically cannot attach safely. This isn’t a matter of forcing it or adding washers. It’s a hard mechanical limit.
You can usually find the VESA pattern in the TV’s owner’s manual or on the manufacturer’s spec page using the exact model number. Some TVs also have the pattern printed on a sticker on the back of the unit.
Weight Rating: What It Actually Covers
A mount’s weight rating refers to the TV’s weight without the stand, not the total shipping weight or the weight of the TV plus the stand. This is a small detail that trips people up more often than you’d think.
More importantly, the weight rating assumes proper installation. A mount rated for 40 kg is only as strong as the fasteners connecting it to the wall. A 40 kg TV on a full-motion arm, extended away from the wall, creates significantly more leverage at the anchor points than the same TV on a fixed mount sitting flat against the wall. The weight hasn’t changed, but the force on the wall has.
The Wall Is the Other Half of Compatibility
In my experience, the wall creates a complication in roughly one out of every three installations, depending on the neighbourhood and the type of property. A TV and a mount can be perfectly matched on paper, and the install can still not work because of what’s behind the drywall.
This is the part most compatibility articles skip. They’ll tell you to “make sure you’re mounting into a stud” and leave it at that. But studs come in different materials, and the wall surface itself can change everything about the hardware you need.
Drywall Over Wood Studs
This is the most common wall type in detached homes and townhouses across Mississauga. The main challenge is that the desired TV position does not always line up with two studs, especially when you’re working with a wide full-motion mount that needs multiple anchor points. For larger TVs, I prefer securing the bracket to solid wood framing rather than relying on drywall anchors alone.
Drywall Over Metal Studs
This is common in condo and apartment construction. It’s also the most common wall condition that catches people off guard. The wall looks like an ordinary drywall wall. The mount’s included hardware is designed for wood studs. But behind that drywall is a thin metal stud that a standard lag bolt will not grip securely.
The fix depends on the situation. You may need properly rated toggle anchors, a reinforcing board mounted between studs, or a different mounting location entirely. If you don’t know what’s behind your wall before you start drilling, you’re guessing.
Poured Concrete
Many Mississauga high-rise condos have concrete structural walls or party walls. Concrete is strong, but it requires a hammer drill, a masonry bit, and anchors specifically rated for concrete. You can’t use wood anchors or lag bolts. It also affects cable management, because cutting channels into structural concrete is not a routine option the way it is in drywall.
Plaster and Lath or Older Brittle Walls
Older GTA homes can have thick, uneven, or fragile wall surfaces. Drilling too aggressively can cause cracking or create a hole much larger than expected. I identify the backing material carefully before I commit to a hole, and I use the appropriate masonry or wood-framing method based on what I find.
Fireplace Walls
A fireplace chase may contain metal framing, non-combustible materials, masonry, gas components, or hidden electrical and venting. The wall may not have the normal wood-stud layout homeowners expect. Heat, TV height, and cable routing all need to be considered before drilling. Fireplace framing can also include non-combustible construction near the firebox that changes which fasteners are appropriate.
A Real Example: When a “Universal” Mount Wasn’t Universal
A customer had a larger Samsung TV and an existing universal wall mount in the room. The mount looked right. The size range covered the TV. The weight rating was more than enough.
But when we lined up the bracket, the TV’s mounting holes were positioned lower and farther apart than the bracket’s adjustable rails could safely reach. The horizontal rails couldn’t extend far enough to align with the VESA holes. On top of that, the original bolts included with the mount were too long for this particular TV. If I had forced them in, they would have contacted internal components.
I stopped the installation. I did not improvise with washers, shorter bolts, or a “close enough” fit. I confirmed the TV’s exact VESA pattern and weight, checked the mount’s specifications, and replaced it with a properly rated mount that supported the TV’s dimensions and mounting pattern. I secured the new bracket to the wall studs, used the correct-length hardware and spacers, leveled the bracket, and tested the TV’s stability before completing the cable setup.
The issue was resolved without drilling unnecessary holes or putting stress on the TV’s frame. The customer ended up with a mount that was actually designed for their TV, and a wall that was properly anchored. The alternative would have been a TV that looked fine on day one but was subtly overstressed at the mounting points, or a damaged back panel.
The Advice I Disagree With
The piece of advice I push back on most is this: “If the mount is rated for your TV’s size and weight, it will work.”
That only confirms part of the compatibility. It does not tell you whether the wall can safely carry the load. It does not tell you whether the VESA pattern actually lines up. It does not tell you whether the bolt lengths are correct for your specific TV. And it does not tell you whether the studs are in the right place for the bracket’s mounting slots.
A related piece of advice that causes real problems is the default recommendation to buy a full-motion mount because “it offers the most flexibility.” In practice, the articulating arm projects away from the wall and creates leverage, especially when the TV is pulled out or turned. That puts more stress on the wall fasteners than a low-profile fixed or tilting mount. Most full-motion mount instructions require the bracket to be secured to suitable wood studs or solid concrete, not drywall alone.
For a TV that will stay centred and relatively flat, a fixed or low-profile tilting mount is often the safer and cleaner choice. I recommend full-motion only when the room genuinely benefits from swivel or extension and the wall structure can support the added leverage.
A specific example: a wide TV where the mounting holes are compatible with the bracket, but the studs are too far apart for the bracket’s mounting slots. The TV and mount match perfectly on every spec sheet, yet the installation cannot proceed safely without reinforcement or a different mount. The box said it was compatible. The wall said otherwise.
My rule of thumb is this: choose the mount for the TV, but choose the installation method for the wall. The wall structure, not the marketing size on the box, is what ultimately determines whether the setup is safe.
My Pre-Purchase Checklist
If you’re shopping for a wall mount and want to avoid the most common compatibility failures, here’s the order I’d work through:
- Confirm the TV’s exact model number.
- Look up the VESA pattern and weight (without stand) from the manufacturer.
- Confirm the mount’s supported VESA range includes that exact pattern.
- Check bolt diameter and length requirements, including whether spacers are needed.
- Confirm the mount’s weight rating exceeds the TV’s weight.
- Identify what is behind your wall: wood studs, metal studs, concrete, plaster, or a fireplace chase.
- Decide whether you actually need full-motion, or whether a fixed or tilting mount will do the job.
- Confirm the bracket’s mounting slot spacing lines up with the studs you can actually access.
If you can answer all of those with confidence, you are in a much better position to buy the right mount the first time. And if any of those steps are unclear, that’s usually the point where a second set of eyes helps.
One Reply to “How to Know if Your TV Is Compatible with a Wall Mount”