
2September 2026
So, you are thinking about finishing your basement. You might already be scrolling through Pinterest looking at home theatres, luxury home gyms, or cozy guest suites. But before you pick out paint colors or buy $20,000 worth of beautiful materials, you need to ask a much less exciting question: Is your basement actually ready to be finished?
As a local professional offering handyman services in Mississauga, I see a lot of homeowners make the mistake of designing a basement solely around how it looks on renovation day. My rule is simple: before making a basement look finished, you have to make sure it is structurally and legally suitable to be finished. If you ignore the hidden realities of below-grade construction, you risk putting a $20,000 renovation in front of a $5,000 hidden problem.
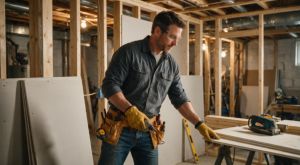
Here is exactly how to audit your basement like a pro before you spend a single dollar on framing.
The Subtle Moisture Red Flags Most Amateurs Miss
When I walk into a Mississauga basement, the very first thing I look for is evidence of moisture. It sounds obvious, but the trick is that I am not just looking for an active puddle. I am looking for the subtle clues that tell me the basement has had a water problem in the past, or has a slow, silent issue happening right now.
The biggest dealbreaker for me is when a homeowner says, “It’s been dry for years, so we can just frame over it.” That is exactly when I slow the project down. In the Greater Toronto Area (GTA), our older housing stock frequently suffers from hidden drainage, grading, or foundation issues. Covering the evidence with drywall and insulation does not solve the problem, it just makes the eventual mold and water damage much more expensive to discover.
When evaluating your walls and floor, look beyond obvious leaks and check the bottom of foundation walls, corners, around windows, and behind any existing framing. Watch out for these hidden signs of trouble:
-
- Efflorescence (that white, powdery mineral buildup on concrete)
- Dark or discolored concrete sections
- Damp, soft, or swollen framing materials
- Faint, musty odors that are easy to dismiss
- Slightly deteriorated drywall or rusted metal fasteners near the floor
- Concrete floor cracks that have been patched repeatedly
Investigate Before You Insulate: A Cautionary Tale
I recently worked on a basement job in Mississauga that perfectly illustrates why you cannot take visual dryness at face value. The homeowner was incredibly handy and had already done a great deal of the work themselves. They had framed most of the perimeter walls, installed insulation, and were just days away from hanging drywall. At first glance, it looked great.
However, as I walked the perimeter, I noticed a tiny bit of efflorescence and a faint musty smell in one corner. I pulled back a small section of their new insulation and touched the concrete. It was noticeably damp.
There was no visible puddle on the floor, so the homeowner assumed everything was fine. In reality, groundwater was pushing straight through the foundation wall. We immediately stopped the finishing work to address the exterior drainage issue.
If they had gone ahead and sealed that wall with drywall, the moisture would have been trapped. Within a few months, they would have been dealing with a rotting wall system, ruined finishes, and toxic mold. They would have paid thousands of dollars to tear down their brand-new renovation just to fix a problem we caught early. Investigate before you insulate, it is the ultimate money-saver.
The Legal and Structural Realities of the Ontario Building Code
A basement can be bone-dry and still fail the readiness test if it does not meet local regulations. In Mississauga, finishing a basement to create living spaces or bedrooms requires a building permit. The city strictly regulates this to ensure safety, and framing inspections will check your layout, window sizes, and firestopping directly against your approved drawings.
Ceiling height is the most common roadblock I encounter. Homeowners often look at their bare joists, see plenty of room, and assume they are good to go. But Ontario’s Building Code requires a minimum clear height of 2,100 mm (about 6’10½”) for finished living spaces. You cannot just measure the highest point; you have to factor in how much height you will lose to flooring, subfloors, ceiling drywall, or dropped ceilings.
Furthermore, older homes in the GTA were rarely built with modern finished-basement expectations in mind. Low-hanging steel beams, major HVAC ductwork, main plumbing lines, and structural posts can drastically reduce your actual usable headroom. If you start framing without a precise plan for these mechanical clearance requirements, you might accidentally build a space that is entirely illegal and unsafe.
Basement Trends That Secretly Compromise Your Home
There are a few popular renovation trends that I consistently advise Mississauga homeowners against because they prioritize “renovation day” looks over long-term structural health.
Conventional Sealed Stud Walls with Fiberglass
Building a completely sealed, conventional framed wall packed with fiberglass insulation directly against a basement foundation is highly risky. Basements naturally experience condensation and temperature shifts. If moisture migrates through the concrete, a conventional wall system traps it. I much prefer modern moisture-management systems that allow the foundation to breathe or drain safely.
Luxury Vinyl Plank (LVP) Over Damp Slabs
LVP is an incredible, durable flooring option, but it has created a dangerous myth. Because LVP is waterproof, many homeowners assume it doesn’t matter if the concrete floor underneath is damp. This is false. While the plastic flooring itself won’t rot, trapped moisture underneath creates foul odors, destroys adhesives, ruins underlayment, and feeds mold growth along the bottom of your baseboards and drywall.
Burying Mechanical Infrastructure
I strongly dislike layouts that completely bury mechanical systems, valves, and cleanouts behind permanent drywall. I always advocate for leaving intentional service access. A beautifully hidden wet bar or flawless drywall ceiling becomes a nightmare the day a pipe leaks or a drain backs up. A clean, removable access panel or a strategically placed utility closet will save you from destroying your finished walls five years down the road.
The 3-Step Tonight Test for Homeowners
If you want to know if your basement is ready for a contractor to step in, you can perform a preliminary check tonight. Grab a tape measure and a good flashlight, and follow these three actionable steps.
1. The Low-Angle Flashlight Inspection
Turn off the overhead lights and walk the entire perimeter of your basement. Hold your flashlight at a low angle, shining the beam flat against the concrete walls and the floor. This raking light will instantly highlight cracks, uneven surfaces, bulging patches, and the white sparkle of efflorescence that you would completely miss under normal lighting. Don’t just ask if the basement is dry right now, look closely for the stains and rust that prove water has been there before.
2. The Overnight Plastic Tape Test
If you want to check for invisible vapor transmission, take a few squares of clear plastic kitchen wrap. Tape them tightly on all four sides to clean sections of your concrete floor and exterior walls using heavy-duty tape. Leave them for 24 to 48 hours. If droplets of moisture form on the underside of the plastic, or if the concrete underneath looks noticeably darker when you peel it up, your slab is releasing moisture. This tells you that you need a proper vapor barrier or subfloor system before laying down finished flooring.
3. Map Your Mechanical Clearances and Heights
Do not wait for a designer to point out structural obstacles. Take physical measurements from your concrete floor to the lowest hanging obstacles, such as your furnace ductwork or main structural beams. Physically locate and take photos of your electrical panel, furnace, water heater, main plumbing cleanouts, and sump pump.
By mapping these out ahead of time, you ensure you are designing a space that functions perfectly around your home’s infrastructure. Remember my personal sequence for a successful renovation: moisture first, measurements second, finishes last. If your basement passes these three basic tests, you are officially ready to bring in a professional and build a space that will look beautiful and stay healthy for decades to come.
If you are ready to take the next step with your basement, let’s talk about turning your ideas into a safe, code-compliant reality. Let me know what specific features you want to include (like a bathroom or kitchen) or the approximate age of your home so we can plan the perfect layout for your space.